Industrial 3D Printer Buyers Guide
Over 77% of printers marketed for high performance polymers can’t reliably print PEEK or ULTEM. Make your next investment with confidence, not consequences.
Overview
Additive Manufacturing (AM) is a powerful tool for creating complex parts extremely fast and affordably. Like any manufacturing process, it is suggested that engineers design their parts with the end production method in mind. This guide is meant to help businesses realize the full potential of AM with a few tips to optimize your designs for printability, aesthetics, and part strength while reducing print time.
Feature Sizing
In Fused Filament Fabrication (FFF), the size of part features are directly linked to nozzle size and extrusion width (many slicers default to 120% of your nozzle diameter). When designing for FFF, consider your layer height and extrusion width as building blocks to work when determining feature dimensions.
Thin Walls
Thin wall thicknesses should be an integer multiple of your extrusion width. For example when printing with a 0.4 mm extrusion width, use 0.8 mm, 1.2 mm, or above wall thicknesses. Nozzles sizes can be switched to accommodate your design.
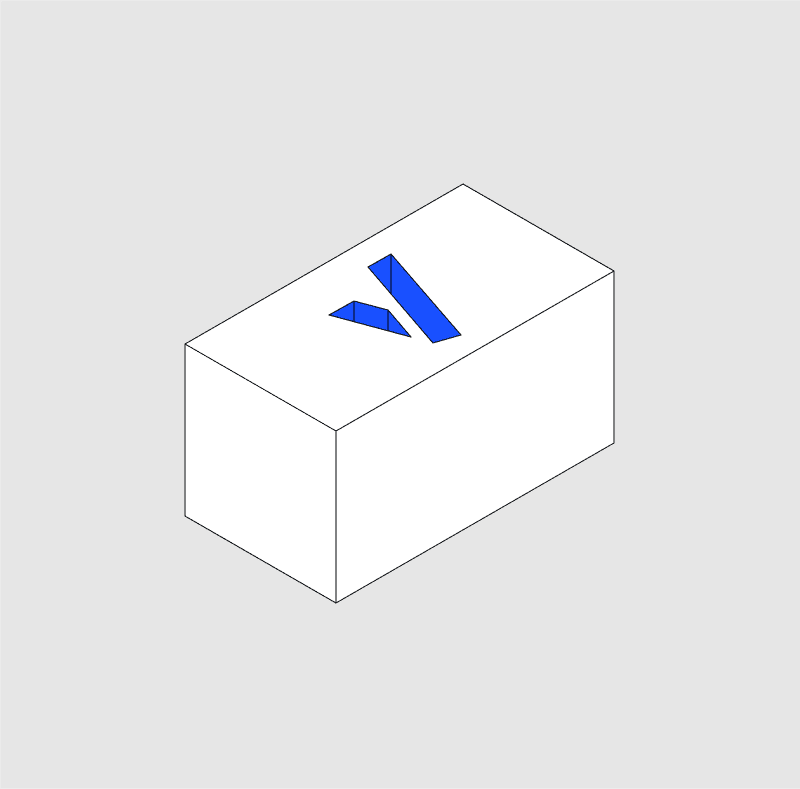
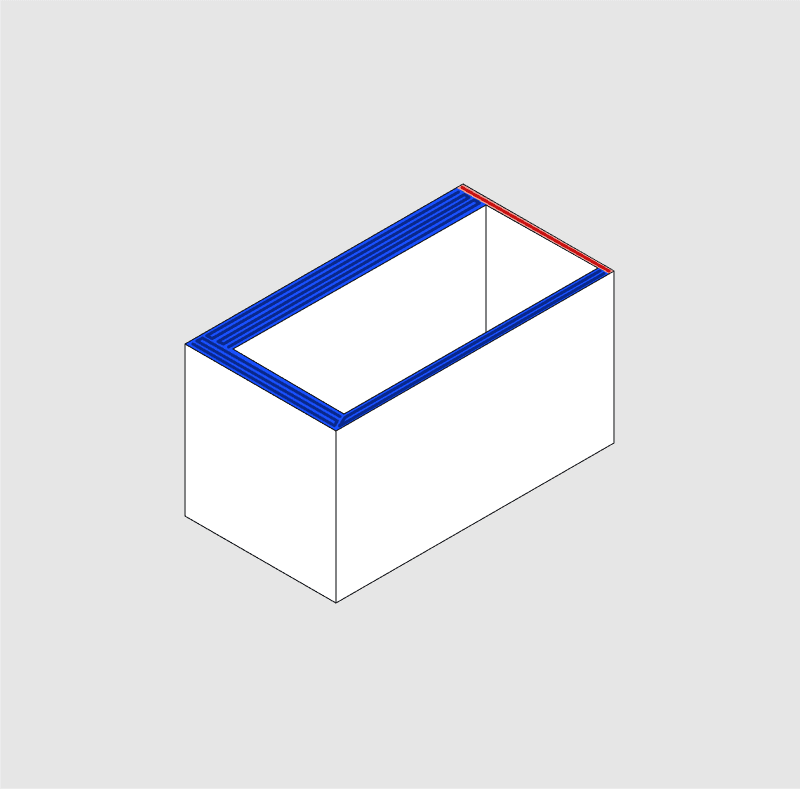
Embossed / Debossed Details
Use a constant width at least twice the
size of your nozzle diameter for a sharper rendering. The depth/thickness should be twice the layer height. For text, use sans-serif fonts (no tails on the ends of characters).

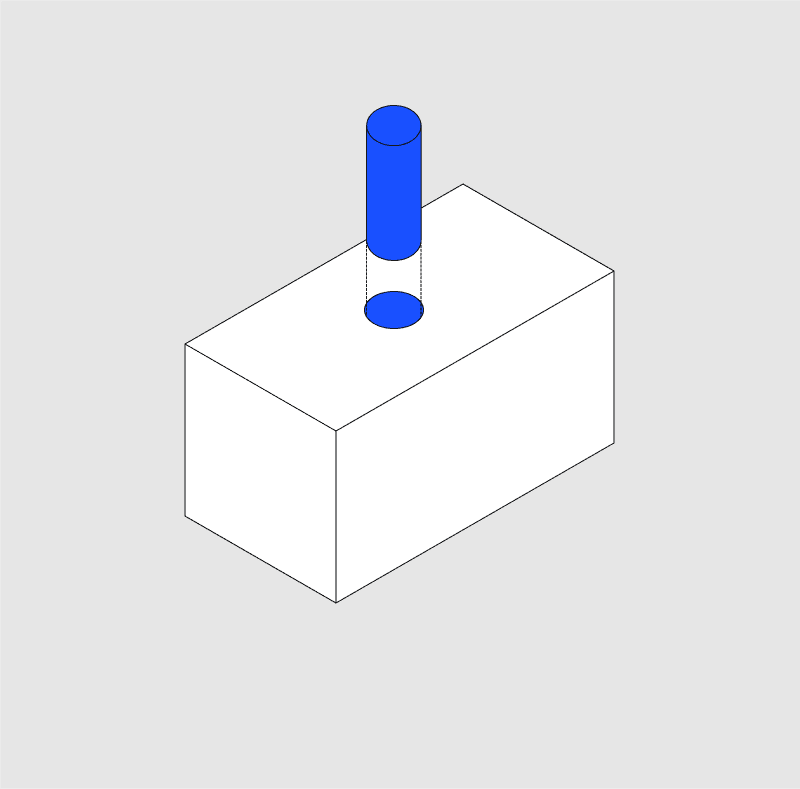
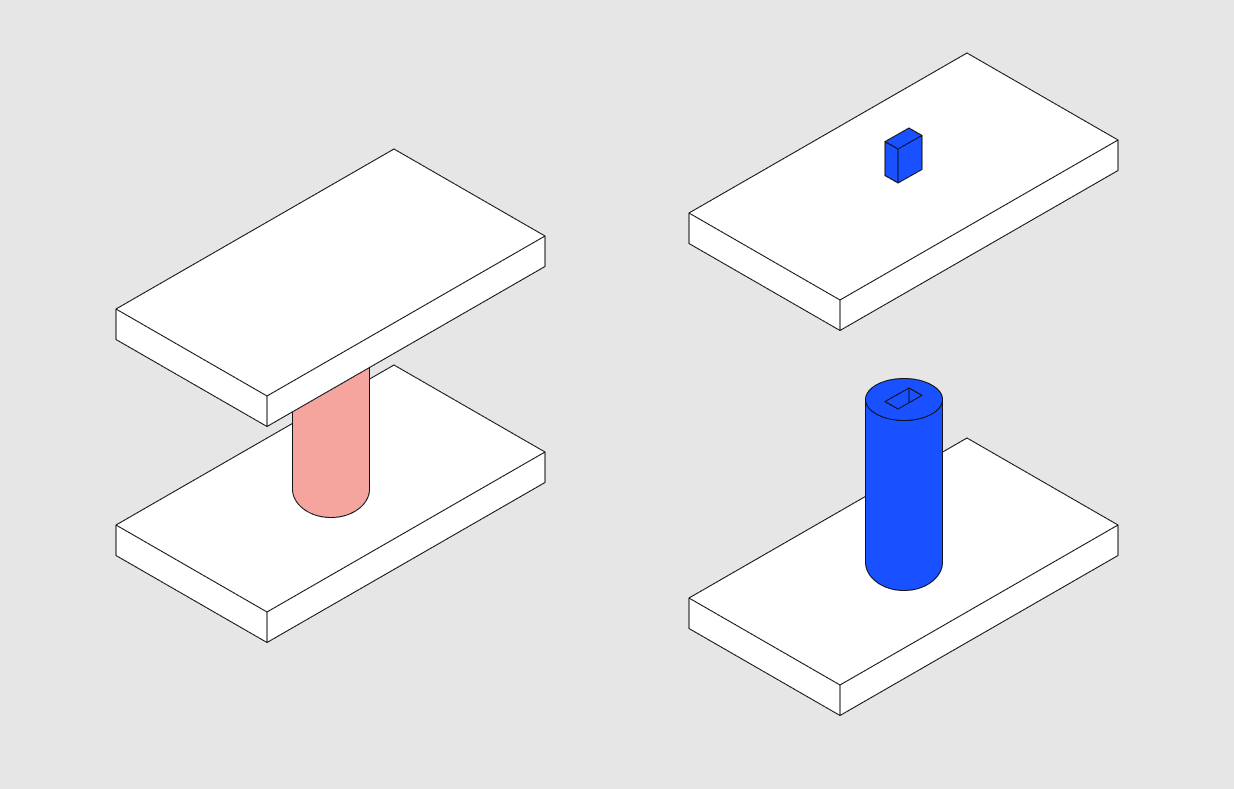
Vertical Holes
Aim for a minimum diameter of 2 mm for vertical holes.
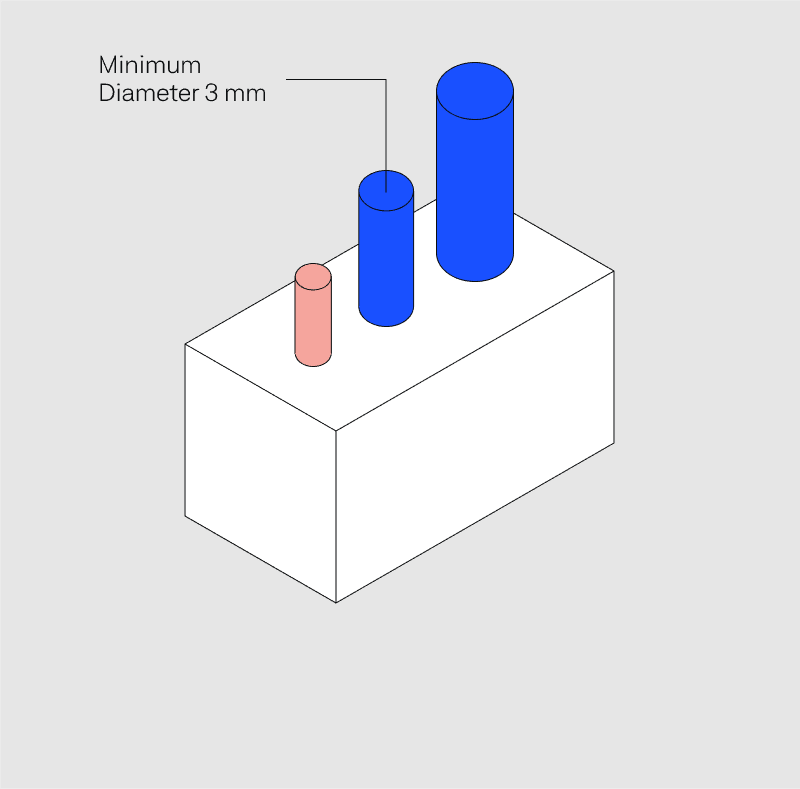
Vertical Pins
Pins that are smaller than 3 mm diameter can be fragile and deform due lack of cooling times between layers.
Tolerances
Use clearances equal to half your extrusion width on two parts that are supposed to fit together e.g., when using a 0.4 mm extrusion width, increase the hole diameter by 0.2 mm and shrink the inner shaft diameter by 0.2 mm.
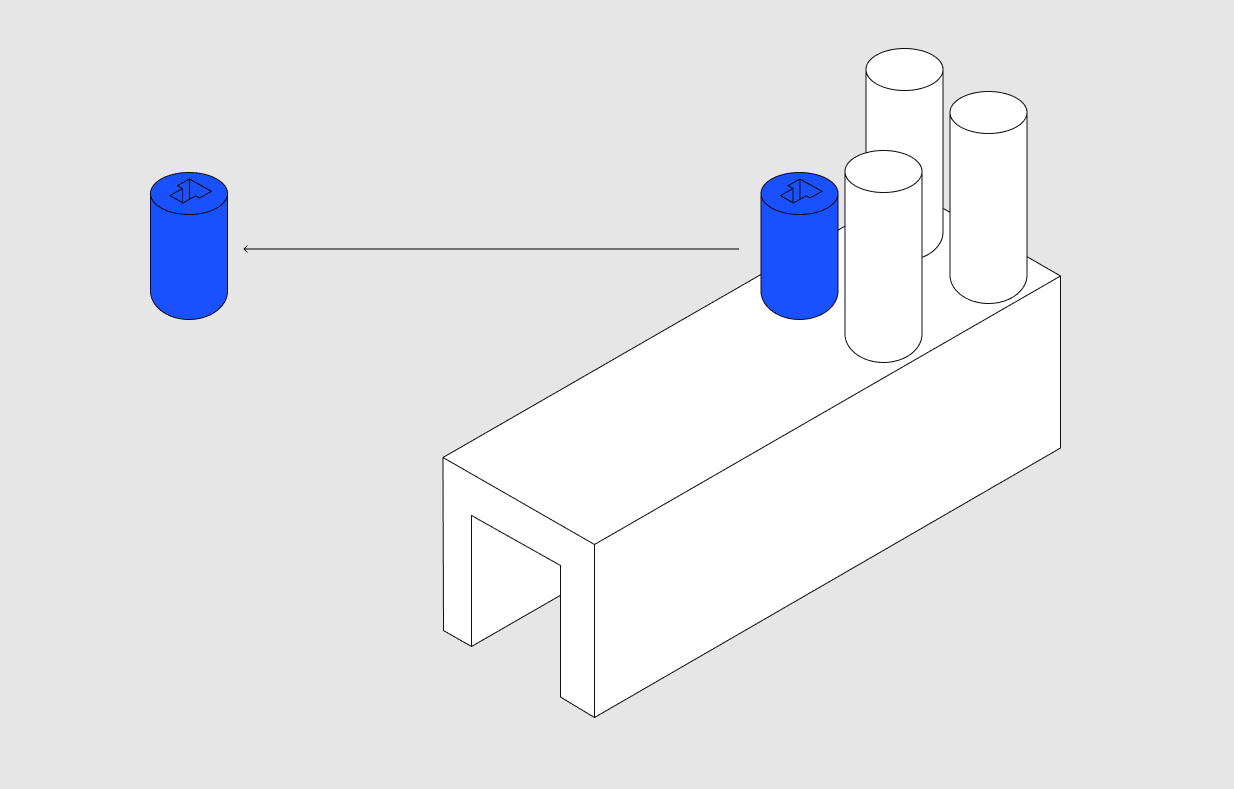
Minimize Support /Mitigate Overhangs
Utilize these tips to reduce the use of support structures, reducing material usage, print time, and manual part cleanup while increasing printability of your part.
Bridge Distances
The bigger the bridge, the larger risk of print defects or failure. Unsupported bridges greater than 20 mm will likely require supports. Note that some materials can bridge better than others and process settings, such as extrusion temperature, can influence the maximal bridging distance.
Overhangs
Overhangs that exceed 45° are susceptible to drooping and may require supports. Steeper overhangs can be achieved by adjusting material type and/or process settings.

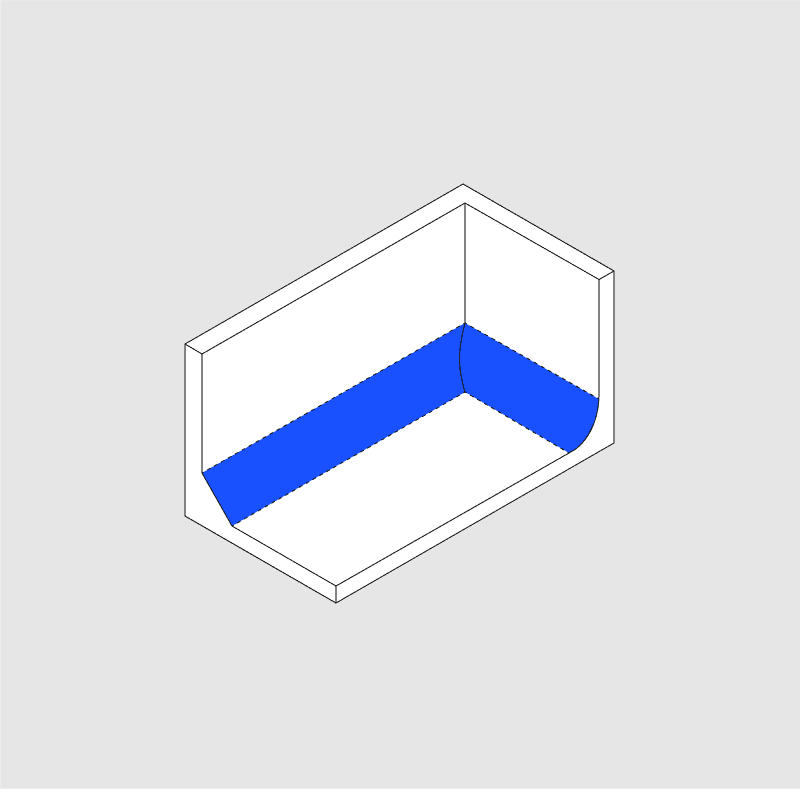
Diagonal Ribs on Roof
Instead of having a large roof, add small ribs so that your print can bridge without having to rely on support material.
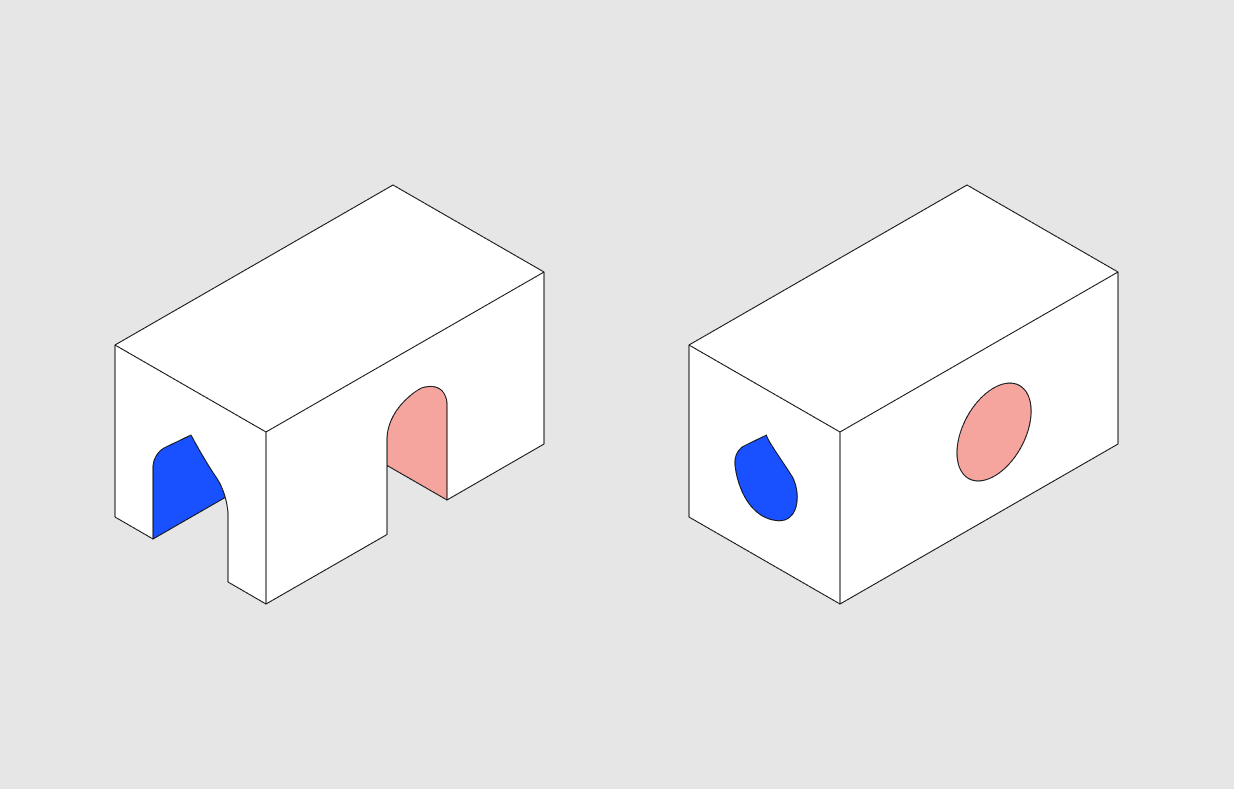
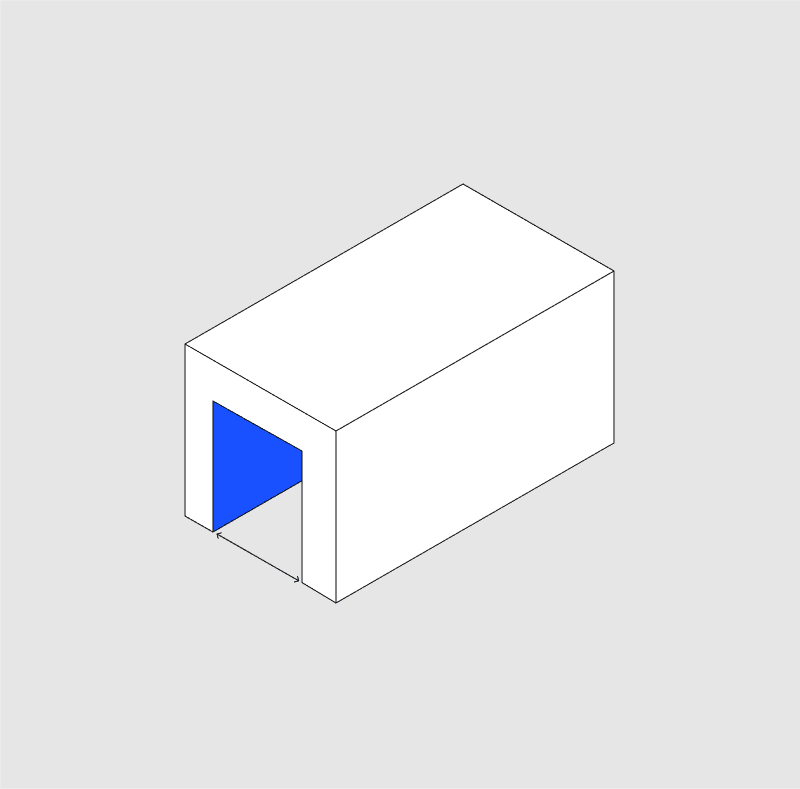
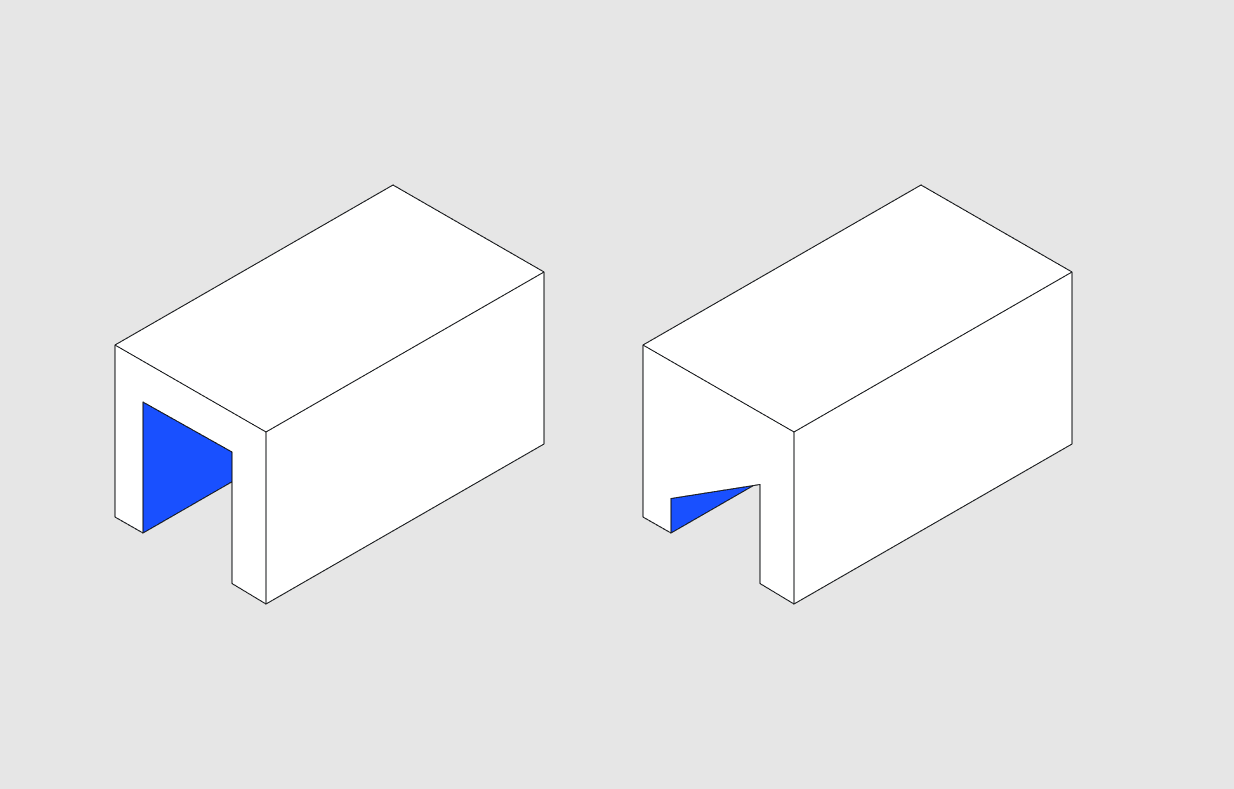
Arches & Horizontal Holes
Arches and the upper sections of a horizontal hole can require supports or a lower layer height, at the cost of a longer print times. Use pointy arches/tear drop shaped holes to mitigate or eliminate overhangs.
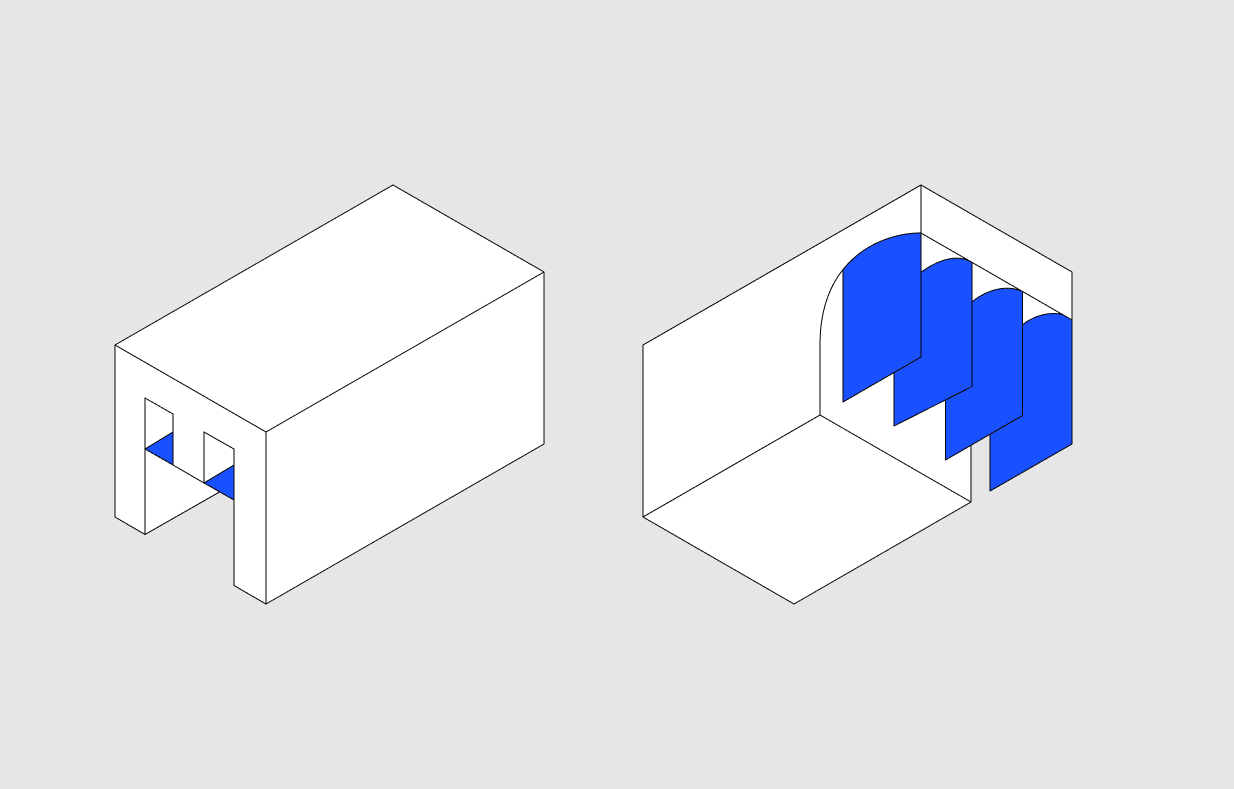
Sacrificial Ribs & Layers
Want a multi-material print but still need supports? Mitigate supports by adding thin sacrificial ribs (equal to your extrusion width) or sacrificial bridging (one layer height) that can be removed after printing.
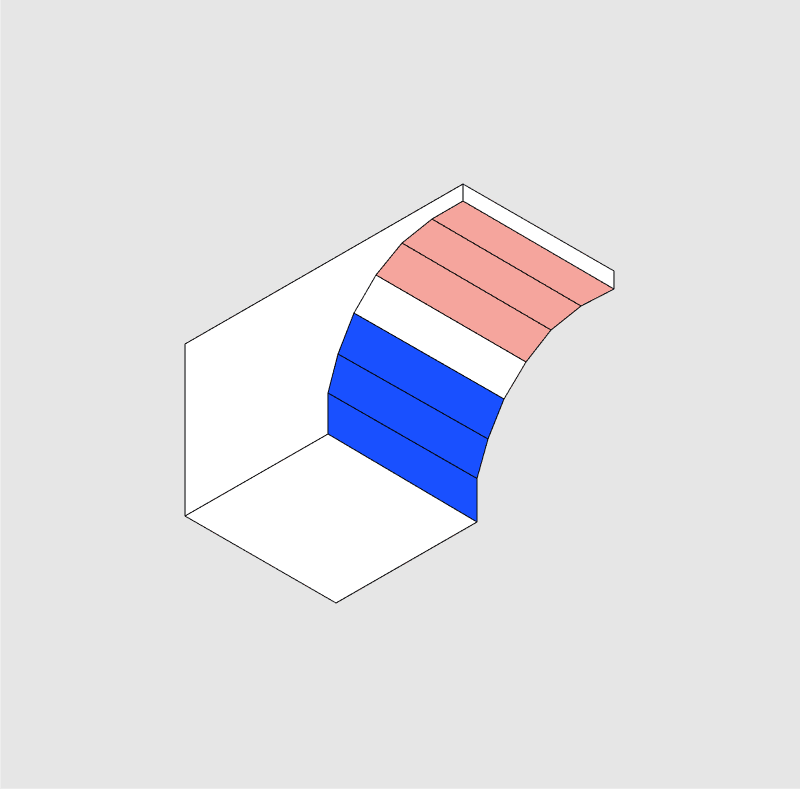
Sloped Roofs
Instead of a flat roof, design a sloped roof with a 45° or low angle (to the vertical direction) that eliminates the need for support structures.
Improving Strength, Aesthetics, & Reducing Warping
Fillet or Chamfer on Wall & Base Intersection
Increase the strength of the structure by adding a fillet or chamfer at the intersection of a wall and base.
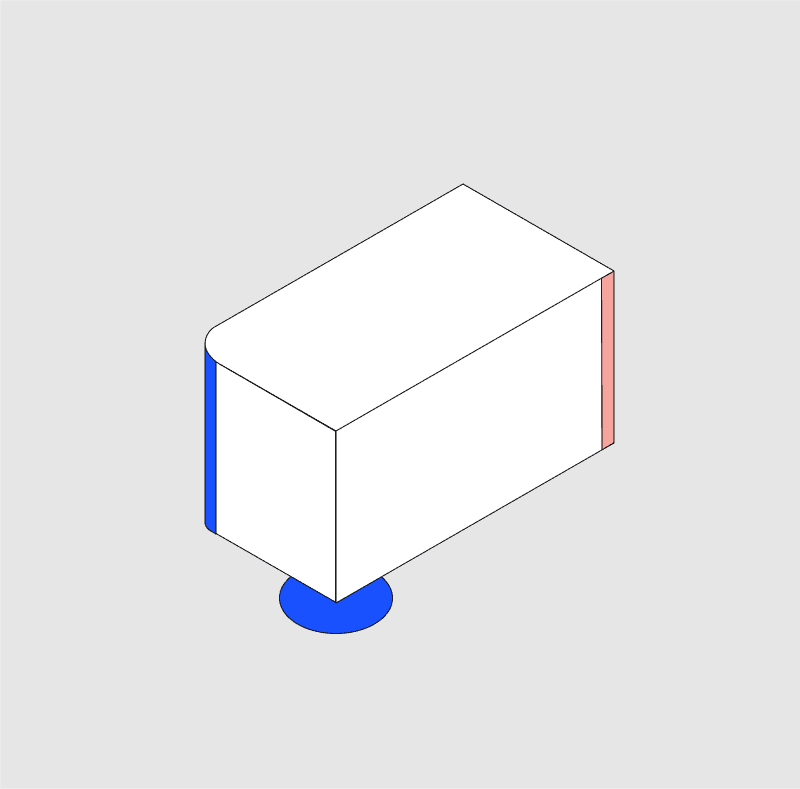
Filleting Corners or ‘Mouse Ears’
Lower the risk of part warping by filleting corners or adding sacrificial ‘mouse ears.’
Additional Tips
Assemblies
Large parts and parts requiring lots of support increase your risk of print failures. Save time and material by creating an assembly instead of printing everything at once.
Micro-Prototyping
When unsure of the printability for a portion of a large print, or when you need to prototype a functional subsection, cut out the section in question and experiment with your design until fully optimized.
Achieve New Levels of Part Performance & Throughput
3D print the world's highest performance polymers - bigger, faster, and stronger than ever.